 25.10.2018, 00:11
|
#1 |
|
Участник
|
powerobjects: Fill Your “Last Mile” Gaps with PowerApps
Источник: https://www.powerobjects.com/2018/10...aps-powerapps/
==============  “Last mile” is a major buzzword right now, especially as it relates to PowerApps. To understand the concept behind the buzz, let’s consider a company that spends millions of dollars on CRM and other software to help induce customers to buy their product. Perhaps the various parts of said product are created in multiple countries, shipped to the US, and driven across the country to stores or warehouses to facilitate a customer’s purchase, all of which is nicely tracked in the CRM. Then, after all that complexity, the sale falls apart in the “last mile,” which is the seemingly simple act of delivering said product to the customer’s house. This is a big issue across industries right now, as customers have high (and constantly increasing) expectations for flawless execution, service, delivery, etc. To that end, it is becoming tougher every day to meet the standards set by the likes of Uber and Amazon, and thus “last mile” gaps are created. In this blog post, we will show you how you can build last mile solutions to ensure your users:
In the home screen below, we have a list of contacts that the user owns. (Note this “gallery” can be filtered based on various conditions.) For each contact, we can do the following with a single click:
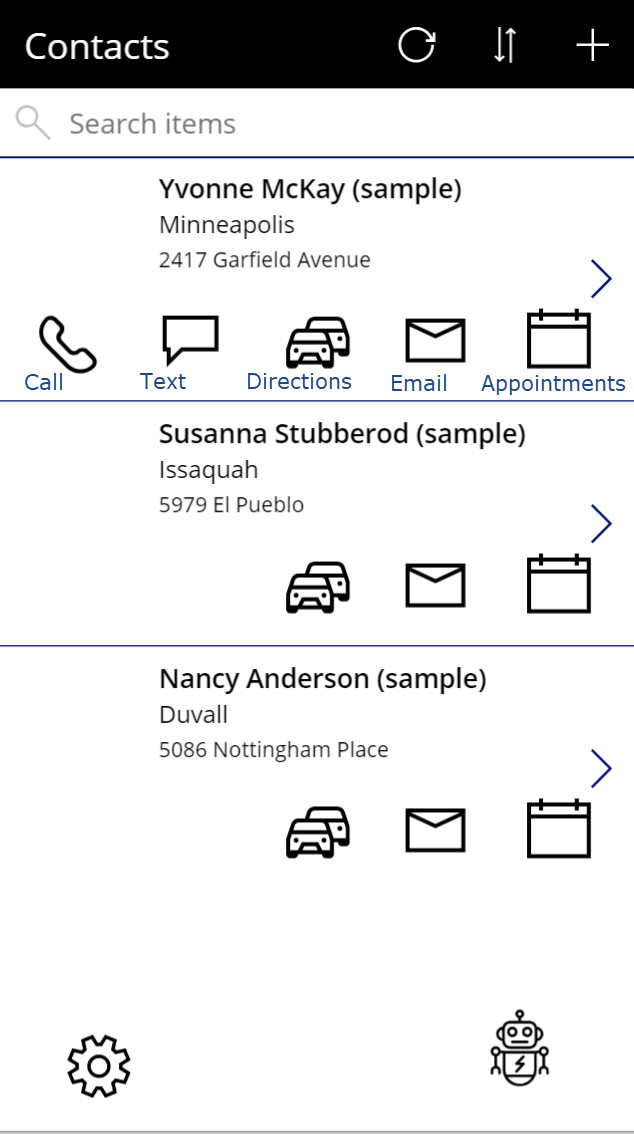 Digression: At the very bottom is a “robot” icon. We have integrated a QnaMaker.ai chatbot with this app that does not require any coding. More on that in an upcoming blog post! Notice that not all contacts have the same icons. That is intentional! If we don’t have a contact’s mobile number, we make our users know that by hiding the call and text icons (another option is to “gray out” the icons). The first three icons under Yvonne McKay perform calling, texting, and getting driving directions – with a single click, as shown in the video below: Clicking on Yvonne’s fourth icon takes us to the next screen, where we can add as many email addresses as we want, compose an email, and send it to everyone. Note: The email screen integrates PowerApps with Exchange, making it a breeze to find coworkers to add to emails. Clicking the final icon for each of our contacts allows the user to do two things: check calendar and schedule appointments. As a bonus, our app once again connects to Exchange to:
The screen is doing a lot here, and the coolest part is that we’re using one of the out-of-the-box screens that are available within PowerApps. In other words, you wouldn’t need to write a single formula to adopt this functionality! Bringing it All Together So, what are we really doing here? Essentially, four things:
As always, Happy D365’ing! Источник: https://www.powerobjects.com/2018/10...aps-powerapps/
__________________
Расскажите о новых и интересных блогах по Microsoft Dynamics, напишите личное сообщение администратору. |
|
|
|
|
|


 Линейный вид

